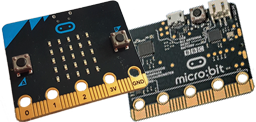
A micro:bit (with or without mbRobot) can be used as a programmable computer. It contains an acceleration sensor, a compass sensor and easily accessible input/output pins, which can be used for various physical experiments.
| Deutsch English |
A micro:bit (with or without mbRobot) can be used as a programmable computer. It contains an acceleration sensor, a compass sensor and easily accessible input/output pins, which can be used for various physical experiments. |
|
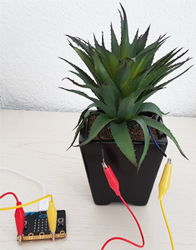
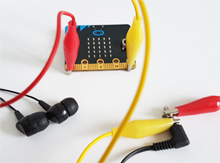
You rarely have to water the small plant, but you must not forget it altogether. With the micro:bit you can control the humidity of the plant soil and, if it is too low, trigger an alarm. (For hydroponics it can also be the water level.) Water is a electric conductor, thus if one creates a circuit from the 3V voltage supply to P0, which leads through water, a higher voltage is measured, than if the circuit is open. You only need two cables with crocodile clips and two pieces of wire or other metal, which you put into the flower pot as probes. One cable is connected to P0, the other to 3V. |
 |
Any water tank can be used for program development.
The command pin0.read_analog() returns the voltage at P0 and you write the value into the terminal window in order to see the difference, depending on whether the probes are in the water or not.
# Mq7a.py from microbit import * while True: v = pin0.read_analog() print(v) delay(500) |
|
Explanations of the program code:
| The system can be supplemented with an optical alarm indicator on the LED display, which shows an image on the display when the water level is low, e.g. display.show(Image.SAD). |
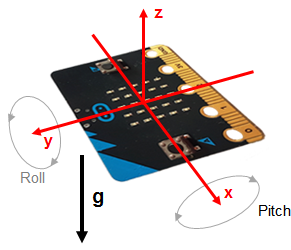
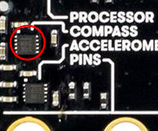
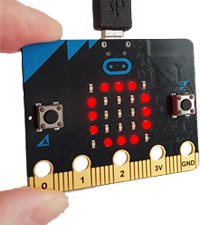
The acceleration sensor is clearly visible on the board. Similar sensors are also built into most smartphones. The sensor can measure acceleration (including acceleration due to gravity) in x, y, and z directions. From these components the forward inclination (pitch) and the sideways inclination (roll) can be calculated. |
 |
|
It is similar to the artificial horizon display of airplanes. If you tilt the board forward or backward, the pitch angle changes, if you tilt it sideways, the roll angle changes. In the program you use the accelerometer object and call accelerometer.get_x(), accelerometer.get_y() or accelerometer.get_z(), which give values in the range from about -2000 to 2000, which correspond to the accelerations -20 m/s2 and 20 m/s2. With acceloremeter.get_values() you get all three values back in a tuple. |
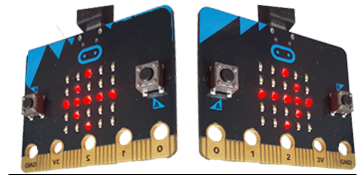
Polling sensor values: In addition, the display shows a left arrow for a positive value and a right arrow for a negative value. |
 |
#Mq7b.py from microbit import * while True: acc = accelerometer.get_x() print (acc) if acc > 0: display.show(Image.ARROW_E) else: display.show(Image.ARROW_W) delay(100) |
Additional remark:
With the following functions you can calculate the pitch and roll angle:
from math import *

def getPitch():
    a = accelerometer.get_values()
    pitch = atan2(a[1], -a[2])
    return int(degrees(pitch))

def getRoll():
    a = accelerometer.get_values()
    anorm = sqrt(a[0] * a[0] + a[1] * a[1] + a[2] * a[2])
    roll = asin(a[0] / anorm)
    return int(degrees(roll))
 |
|
Before starting any compass application, you must calibrate the sensor with the compass.calibrate() command. from microbit import * compass.calibrate() After starting the program, it blocks and you are invited to create a circle figure by tilting the board in all directions until all external LEDs form a glowing circle. Then the HAPPY image will immediately appear on the display and the calibration is done. |
 |
|
Creating a compass application
|
#Mq7c.py from microbit import * if not compass.is_calibrated(): print("Perform calibration please!") compass.calibrate() while True: h = compass.heading() print(h) if h >= 22.5 and h < 67.5: display.show(Image.ARROW_NW) elif h >= 67.5 and h < 112.5: display.show(Image.ARROW_W) elif h >= 112.5 and h < 157.5: display.show(Image.ARROW_SW) elif h >= 157.5 and h < 202.5: display.show(Image.ARROW_S) elif h >= 202.5 and h < 247.5: display.show(Image.ARROW_SE) elif h >= 247.5 and h < 292.5: display.show(Image.ARROW_E) elif h >= 292.5 and h < 337.5: display.show(Image.ARROW_NE) else: display.show(Image.ARROW_N) delay(10) |
Explanations of the program code:
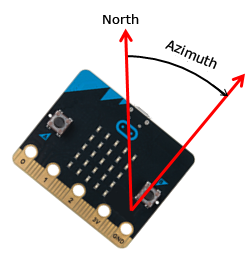
| h = compass.heading() Returns the azimuth in degrees |
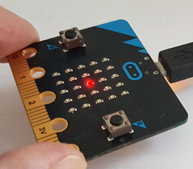
Example 4: Searching mines using a magnetic field
You put a small magnet, as you find it for memoboards, under a cardboard lid. The magnet can be understood as a mine, which you have to find with the micro:bit as a mine detector. The center LED lights up the brighter the closer the board gets to the mine. You use the function compass.get_values(), which returns the strength of the magnetic field as a tuple with the x-, y- and z-components.. |
 |
#Mq7d.py from microbit import * import math while True: v = compass.get_values() b = math.sqrt(v[0] * v[0] + v[1] * v[1] + v[2] * v[2]) z = min(9, int(b / 500000)) # brightness display.set_pixel(2, 2, z) delay(10) |
Explanations of the program code:
| b = math.sqrt(v[0 *v[0] + v[1]*v[1 ] + y[2]*v[2]) Amount of the three magnetic field components | |
| z = min(0, int(../b/500000) The amount is scaled so that you get a value between 0 and 9 |
| Exercises: |
1) |
|
 |
2) |
Set up an alarm system that monitors whether a door is opened. Hint: Use the acceleration sensor. |
3) |
|
 |