| Deutsch English |
1. Setup
Maqueen (mbRobot)
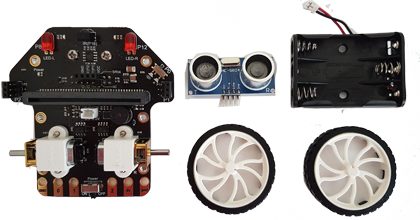
The Micro:Maqueen kit (sources of supply: bastelgarage.ch, www.mouser.ch, www.educatec.ch ) contains an 8 x 8.5 cm board, which the following already assembled components:
An ultrasonic sensor, two wheels and a battery holder must be installed. |
 |
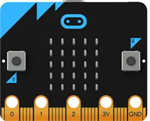 |
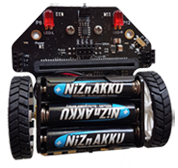
Additionally you need a micro:bit V2 and three AAA (1.5 V) batteries. For rechargeable batteries you must use nickel-zinc batteries, since they must deliver 1.5 V. |
 |
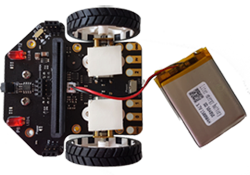
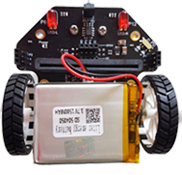
Instead of the three AAA batteries, we recommend to buy a Lipo battery (3.7 V, 1.5 Ah) and attach it to the motors with a double-sided adhesive tape. Source of supply www.bastelgarage.ch. The flat Lipo battery is particularly advantageous if you later want to add an ESP 32 coprocessor for IoT applications. |
 |
 |
Installing the micro:bit MicroPython firmware
The programs are developed with the TigerJython programming environment. After editing, the program is downloaded via a USB cable to the micro:bit and executed there with a MicroPython interpreter (a reduced Python version).
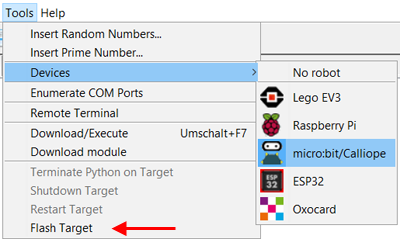
Previously MicroPython must be installed on the micro:bit as follows:
Connect the micro:bit to the computer via a USB cable. The micro:bit is recognized as an additional external USB device. (For Windows versions earlier than Windows 10 you have to install a USB driver. The installation file can be downloaded from here: mbed.zip).
|
 |
Testing motors
Start TigerJython and enter the following test program or click on "Copy to clipboard" and paste it with Ctrl + v in the editor window. Test program: from mbrobot import * forward() delay(2000) stop()
The two motors should run forward for 2 seconds. |
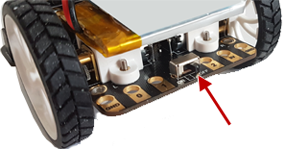
With a tiny switch at the back of the Maqueen board the power of all board components is switched on. It is often a good idea to apply power only after downloading the program, especially if the robot immediately starts to move. |
| A reset button is located on the back of the micro:bit. By clicking on this button, the last downloaded program can be executed again at any time. |  |
Motoren kalibrieren
If the robot is not travelling in a straight line, you can use the Calibration.
Testing the ultrasonic sensor
Program: from mbrobot import * repeat: d = getDistance() print(d) delay(200)
|
The distance measured by the ultrasonic sensor is displayed in the terminal window. Place your hand or an object in front of the robot. If the numbers in the terminal window correspond approximately to the distance in millimeters, the ultrasonic sensor functions properly. |
Maqueen Plus (mbRobot_plus)
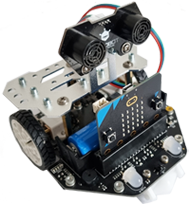 |
The mbRobot Plus can be assembled according to the enclosed instructions. In addition, a micro:bit V2 and a rechargeable battery (Li-Ion, 18650, 3.7 V, 2300 mAh) must be obtained. Since the hardware of mbRobot and mbRobot Plus is different, one needs an additional command library. The module mbrobot is automatically copied to the micro:bit during flashing. The module mbrobot_plus has to be installed additionally. You can download the module here: |
The module mbrobot_plus can also be found under the additional modules (TigerJython /Help/APLU Documentation / microbit /Additional Modules). You can download the latest version at any time and copy it to the micro:bit. |
Testing the ultrasonic sensor
|
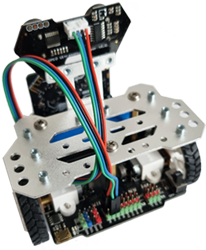
Connect the ultrasonic sensor to the Maqueen Pluss board using the cable supplied. Connect the red cable to 3V3 pin, the black to GND, the blue to P2 and the green to P1. Test programme: from mbrobot_plus import * repeat: d = getDistance() print(d) delay(200) |
| The distance measured by the ultrasonic sensor is displayed in the terminal window. Move your hand or an object in front of the robot. If the numbers in the terminal window correspond approximately to the distance in centimetres, the ultrasonic sensor is working properly. |
Maqueen Plus V2 (mbRobot_plusV2)
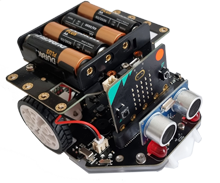 |
The Maqueen PlusV2 is delivered practically ready assembled. In addition, a micro:bit V2 and four A+ batteries must be procured. Since the hardware of mbRobot and mbRobot PlusV2 is different, one needs an additional command library. The module mbrobot is automatically copied to the micro:bit during flashing. The module mbrobot_plus2 has to be installed additionally. You can download the module here:: |
If the robot is not travelling in a straight line, you can use the Calibration. The module mbrobot_plusV2 can also be found under the additional modules (TigerJython /Help/APLU Documentation / microbit /Additional Modules). You can download the latest version at any time and copy it to the micro:bit. |
Testing the ultrasonic sensor
from mbrobot_plusV2 import *

repeat:
    d = getDistance()
    print(d)
    delay(200)
|
The distance measured by the ultrasonic sensor is displayed in the terminal window. Move your hand or an object in front of the robot. If the numbers in the terminal window correspond approximately to the distance in centimetres, the ultrasound sensor is working properly. |
Robot Simulation
Many simple programs for the mbRobot can also be executed with a virtual robot (in simulation mode). The robot movements are displayed in a graphics window. Even infrared and ultrasonic sensors as well as LEDs can be simulated. The programs for the real and the virtual robot are practically unchanged.
To execute a program in simulation mode, click the green start button.
The robot in the graphics window moves a short distance forward. |
Test program: from mbrobot import * #from mbrobot_plusV2 import * forward() delay(2000) stop()
|
If you are working with Maqueen Plus V2, use the import line
from mbrobot_plusV2 import *


